With a semester’s worth of practice, I’m ready to share my experiences with the Interactive Notebook in math and physics.
An Interactive Notebook (IN) is a bound notebook, typically a composition book or spiral notebook that a student uses for notes, practice, and reflections during a course.
The interactive-notebooks Wikispace is a great place to start.
Here are the rules I give the students:
- The right pages are for input, left pages are for output. That means I’ll often give you notes on the right and you’ll practice or reflect on the left. [Teachers: Write lesson plans, including planned pages where everything goes.]
- Number each page as you use it. Put a title and date on every page and enter the title on your Table of Contents. [Teachers: maintain your own classroom copy of the book. Students love to look at your example, especially when they’ve been absent. To keep ’em honest, I like to NOT answer the problems.]
- Never go on to the next page unless directed by your teacher. If you need more space, glue loose leaf paper to the bottom of the page and fold it up. [Teachers: keep loose-leaf paper available for students. Try to anticipate when a problem set will be too long for the space you’ve allotted.]
- Use pencil and colored pencil only in the IN because marker and highlighter both bleed through the page. [Teachers: keep colored pencils available in the classroom for use on a daily basis.]
- Use tape or gluestick only because staples add unnecessary bulk and sometimes rip the pages. [Teachers: again, keep these available for regular use.]
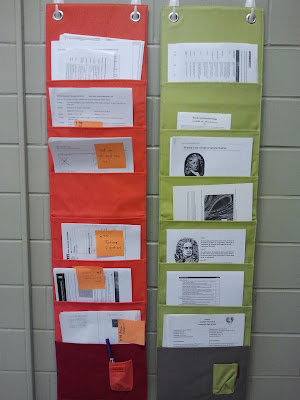
I like to keep my extra copies in this wall organizer. The sticky notes and a marker live near the organizer and I often ask a student to keep it organized. (In my picture, you see orange for math and green for physics.)
 |
| From School Stuff |
I attach handouts into the IN several different ways. Here’s the easiest: se a gluestick to paste the back of the handout into the notebook, sideways. Super-duper cool tip: use the “print 2 pages on 1” option of your printer to get stuff half-size — it fits on a IN page with no folding.
 |
| From School Stuff |
For the warmup or bellringer activity, sometimes I provide kids with the problem on a slip of paper, to be pasted in. You can get a bunch of problems on one page this way.
We do a reasonable number of foldables in my class. They can also be placed in the IN several ways. One is with the pocket. I like to ask kids write a reflection or conclusion on the bottom few lines, below the pocket. The pocket is also a great place to store lab reports, graphs, or other work that was done outside the notebook.
 |
| From Phone uploads |
A cutsey pocket can be made of construction paper and stapled in the back cover (glue would be too fragile). Here’s mine:
 |
| From School Stuff |
I don’t think much of what I do in the classroom could be described as artsy-craftsy. Ok, probably nothing is artsy-craftsy. That purple pocket above is about as cutsey as I’ve ever done.
Aside from being crafty (and therefore appealing to that type of student), the IN helps everyone stay organized. We don’t lose assignments, forget to bring the vocabulary flash cards to class, or need a sheet of paper (that will inevitably get lost).
In part 2, I’ll talk about how I manage grading work if the kids have all their papers with them all the time.

Thanks for sharing this! I’ve just started my student teaching, and I can already see how great this system would work in a math classroom. The students I have been observing take notes on loose leaf paper that is then folded up and placed in backpacks or pockets or the trash can. This would keep all their notes and their homework together. I’ll be bookmarking this to implement in my own classroom next year.
Thanks for sharing! I am planning on starting interactive notebooks in my Algebra I classes with the start of the second semester. I’m looking forward to reading about how grading is going for you.
@mathequalslove, I also had trouble with discarded notes. Big help here.
While we wait for me to pull together the next post, @tamarah, go get yourself a date stamper and make it a habit to “check” assignments by stamping the page with the day’s date.
Thanks for sharing! I have my math students keep a binder with sections for notes, homework, journals, and quizzes/tests, and I do periodic binder checks to see if it’s in order. Everything is hole punched so it can go in the binder. But I love the idea of numbering the pages and keeping a table of contents. I think that will really help with organization – thanks!
Megan,
What do you think about Interactive Notebooks for Summer School? Do you think it could work?
Absolutely, Terrance! Set up these structures: 1) use only right pages for input (notes, your examples) and left pages for output (limited student practice, reflection, graphic organizers). 2) keep your own notebook as you go along. And, 3) Do a lot of tape-in foldables (kids seem to love ’em).
I suppose the main difference between school and summer school is the number of hours you see the kids each day. At Clarkston, where I taught last year, they’re running 4 hour sessions for each subject — yowzas! I suggest breaking up the Interactive Notebook work with work on whiteboards or other media. Don’t feel bad about leaving much practice out of the book. In my opinion, the INB should be a repository of the best the kid can do, not everything the kid did.
Good luck with summer school and please do let me know if you use the INBs!
So as a math teacher, what are the biggest challenges when using interactive notebooks?
I think there are 3 math-specific challenges with interactive notebooks:
First, the interactive notebooks use a right/left page design very intentionally where the left page is meant for student reflection and meaning-making. I found this very difficult to do in math. Suppose the topic is the quadratic formula. (in a traditional lecture-based classroom…) On the right page, students took notes, wrote the formula, and took down several examples (2 real solutions, a double root, and 2 complex solutions). What shall we do on the left? Students can practice there, sure, but I think that’s missing a big part of the notebook’s purpose. But what reflection can you *really* do on the quadratic formula?
Second, Deciding what work should go in the notebook and what doesn’t need to be there. If you think of the notebook as your student’s textbook, you’ll soon realize that some practice can simply be left out. Knowing in advance what to put in the notebook and what could be done on whiteboards was tough.
Third, getting the kids to refer back to their own notes. Maybe this was just my kids or me, but they never seemed to dive back into their notebooks to retrieve information they’d written there. Ugh!
“real reflection”– Would you offer the students ideas for reflection? Is your expectation that they reflect write after taking notes?
I love the idea of IN. I teach ALg2 and Pre Calc. It’s annoying to see kids toss their notes in their bookbags folded up and such( and can’t find them the next day). I think implementing this approach might help eliminate the “folded up notes in the book bag” issue.
So my questions are:
1) for the reflection–on the left side– what prompts do you give to the students to begin this reflection? Is the reflection they make graded by you?
2) Where does HW go in the IN? Wouldn’t HW crowd the IN to quickly? Would the HW go on the left side? How many HW problems do you give?
FYI– I used to edublog…ahh; some things went well, some didn’t…I ran across you all–and I m kind of getting the fuzzies again.
Thanks so much for sharing! Ever experimented with Interactive Notebooks in an electronic medium?
My partner teacher at my school is trying something interactive notebook like in EverNote this year. It’s called “The Old, The Borrowed, The New and Awesome.” I think he adapted it from one of these links:
http://edbus.saschina.wikispaces.net/What+is+an+Interactive+Notebook+Entry%3F
http://digital-interactive-notebooks.wikispaces.com/Digital+Interactive+Notebook+Overview
Same idea of having kids make meaning of all the notes they take. I’m interested to see how it turns out for him. I just use an actual notebook for our interactive notebooks. I just use the left page for input and right for output because the kids and I just find the other way confusing (i.e. working on page 91 before p. 90).