(I wrote this in February of 2006 for a project I did with fourth and fifth graders during National Engineering Month.)
Introduction
Welcome to Bridge Building brought to you by the fourth and fifth grade class at Chrysalis Experiential Academy. We built bridges because we thought it would be fun to see how many pounds we could hold. Would you belive one bridge held over 100 pounds?
Here’s how we did it.
— Stephanos, grade 4
Rules
The class first agreed on ground rules for the project. They agreed to abide by these restrictions:
- Made only of school glue and craft sticks.
- Bridge must span 12″ minimum.
- Bridge must be at least 2″ tall and no more than 12″.
- Bridge roadway must be big enough for a Hot Wheels car to pass.
- Bridge must hold weight for at least 15 seconds to count.
Design the Test Apparatus
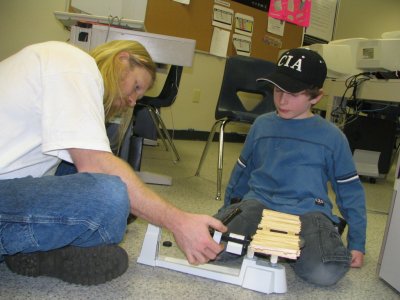
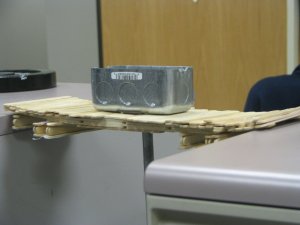
We used less than $20 to buy simple hardware from Lowe’s. We knew we wanted to hang weight from the center of the bridge’s span, so we were looking for a plate from which we could suspend weight.

Testing Procedure
Another important part of the project was agreeing on the testing procedure.
We developed the following before any building began.
- Weigh the bridge.
- Weigh the testing rod.
- Attach testing rod to the bridge.
- Hang weight on the testing rod, incrementing by 1.25 pounds.
- Start timer for 15 seconds.
- Record weight and comments about bridge’s reaction.
- Continue adding weight until bridge fails.
Tips
Stephanos
- “…make the stick supports double layered.”
- “Don’t put a ton of glue on. Use medium dots instead.”
- “Put binder clips on before glue dries to help make the bond stronger.”
- “Take your time. Neater bridges are stronger.”
- “Have a lot of popsicle sticks, glue, and clips ready when you start.”
Jake
- “The popsicle stick is stronger when on its side.”
- “When you make the roadway, stack the support sticks sandwich-style.”
- “Make your bridge strong on the ends, not just in the middle.”
© 2006 Chrysalis Experiential Academy

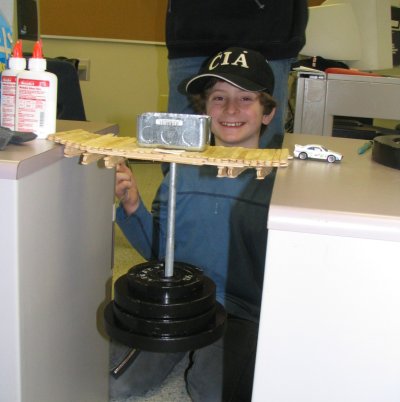
The bridge failed because it bent into a U shape. It bent till it was shorter than twelve inches. If it was a few sticks longer it would have held more than 105+lb. I know this because I’m the guy in the pictures wearing the C.I.A. hat and the bridge in the pictures is the bridge that held 105+lb and I built it.
dude we had to make a bridge out of popsicle sticks and elmers glue. mine came in first(with it never breaking or bending or even making cracking sounds)and it held over 160 pounds!!!!!!!!! BEAT THAT!!!!!!!!!!!!
im start to make the bridge. i think that the idea is good.
iam building a bridge for my homwwork from my science teacher, i didnt read all of what is here but glanced over it all.i think it is cool a bridge made of pop sticks could suppport my weight but anyway i have printed some ideas for mine and think they would help thanks for whatever you did i guess i dono there just this message box so i though i would sign it ok bye bye Lori
These bridge directions are great – we have never figured out how to truly test our bridge strength.
Your science project was so totally wack….If you noe what that means…..It means it didnt help me with a thing….But thanks for trying….
n ice bridge help us build ours
hey thanks! It helped a lot
thanks for the bridge building help
ya so this website didnt help that much because it didnt have the rules my class has right now the rules in my class is to only use 40 popsicle sticks and the bridge has to be 30 centimetres long oh ya and the glue for our bridges have to be carpenter glue or school glue!! so ya the rules her on this website are diffrent then my class rules and thats why it didnt help me!!! so bye (P.S. i wish people can make a website that actually a has MY classes rules in it!!) SO BYE!!!
wow that a really cool brige
This helps me a lot on my project! Thanks now I can get to work
I wasn’t planning on making a bridge, but these are amazing!!! I disagree with Tamariz, because these are much more detailed tips then I’ve been able to find on my other projects. Thank you!
Those bridges are so cool I wish that I could build them! I might try to build one sometime! Its amazing that one bridge can hold one hundred pounds!!!! And Tamariz DON’T BE SO MEAN maybe you made the mistake not her! Thankyou so much, mrs. golding!
I think it would be cool if somebody stood on the bridge in stead of weights!
whats up!!
Great information. Keep up the great work. I love Google.
THAT IS COOL IM STEALIN THAT IDEA
THATS COOL
omg !
suk it