We’re installing robotic sprinklers in the school’s greenhouse! And this post details the project to date.
Step 1: What physics can we do in the greenhouse?
Last spring, when our garden manager Emily approached me about creating a project that brought together her garden and my physics classes, I was interested.
“What does the greenhouse need?” I asked Emily.
She rattled off a few ideas, including improved irrigation. I didn’t see an obvious connection until I started poking around the Arduino world. Automated irrigation, managed by the inexpensive microcontroller, is a popular thing these days.
As the project started to take shape in my mind, I imagined kids learning about electrical resistivity. We’d experiment with some of the ways the soil can vary resistivity, including the geometry of the sample and the water content. I grabbed a soil sample and a multimeter. In my mind, we were going to see a clear relationship between the variables of distance between the probes or moisture content and resistance. Instead, the readings were all over the map. Oh no!
Step 2: Find one physics principle to hang your project on.
I thought we were sunk after that one test with the soil sample. I needed some good news, and soon (it was about a month before the planned kickoff date). To be completely honest, this was the low point of the planning process.
When I started researching the project, I’d started off looking at the Soil Moisture Sensor sold by SparkFun. From there, I found Vegetronix sensors and control boards.


My much-needed good news came in the form of Tim at Vegetronix in his Techno Gardener video:
What I saw was an easy lab experiment where we could vary water content of soil and measure different voltage outputs. That’s all I needed to go forward.
In terms of a physics principle, we talked about resistance in class, even completing a light bulb lab meant to explain series and parallel connections. I explained that some soil moisture sensors measure resistance/resistivity. Our sensor, however, measures something called the dielectric constant, which is beyond the scope of this class. Yeah, it was a little hand-wavey. Still, the electric circuits needed to connect the sensors to their control boards and to the solenoid sprinkler valve are relevant.
Step 3: Kickoff the project with enthusiasm.
I brought greenhouse manager Emily in to classes to introduce the project. She explained to the kids that they’d form a company to build an irrigation system for her as a client. She explained that she and Joey, the garden managers, must water everything inside the greenhouse approximately every other day.
Emily brought in James from our facilities department to teach the kids about how our campus draws water from an underground aquifer to irrigate all the green spaces on campus. She also brought in Joey, the garden manager, to teach kids about plant types that we grow in the greenhouse as well as about the raised beds we’ll be installing into.
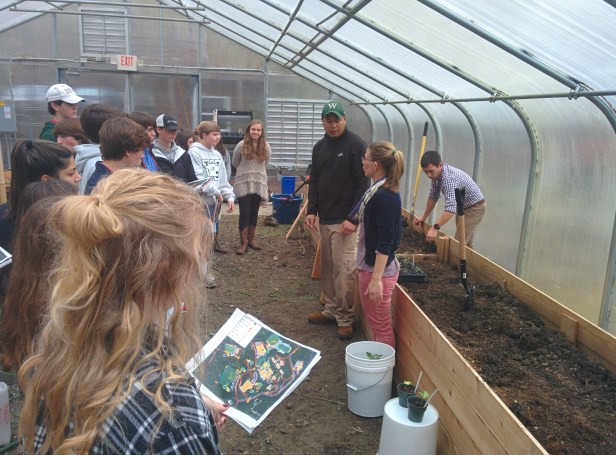
From here, I encouraged the kids to choose a role they want to fill within the “company”. They could choose to be electricians, plumbers, or technical writers. My teams aren’t even, which is ok with me. Every kid has a job they chose, which was the important part.
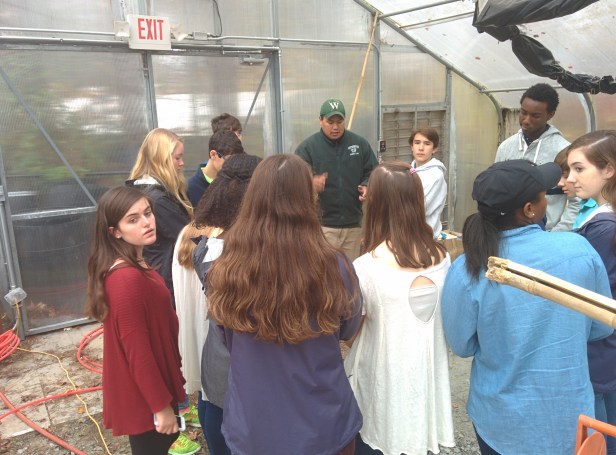
Step 4: Concoct a lab for kids to learn about the sensor.
In classic one-sentence lab form, I asked the kids, “How does the moisture sensor indicate soil moisture to us?”
Job roles became useful at this point — I taught just the electricians how to hook up the sensors to a multimeter (their first time using either). After showing them on one lab station, I sent the electricians out to set up the other lab stations, referencing mine as a working example.
Meanwhile, the tech writers and plumbers did internet research aimed at several questions I anticipated them having:
- How do we wire up a moisture sensor?
- What’s the sensor’s output? ____ to _____ volts, which correlates to ____ to _____ amount of soil moisture.
- How does the sensor work? hint: see vegetronix.com
- If you wire the probe incorrectly, what’s the output look like?
- Can wiring the probe incorrectly damage it?
- What other ways are gardeners automating their watering? (like, what about low tech options?)
- How would you describe the moisture level in soil? Is there some industry standard way of doing this?
We did the lab in lab groups, which are made up of several different job titles.
One aspect I loved when kids did the sensor lab in class was how they had to figure out a smart way to describe moisture content. Kids quickly realized that it was insufficient to note how many milliliters of water they added to their differently-sized soil samples.
Next Steps: Rubrics & time to work.
So here we are, Thanksgiving vacation, and I’ve just started the project with the kids. My next tasks are to finish off documenting what I expect from the kids in term of work products plus the rubrics I’ll assess them with.
We have about five class days remaining dedicated to installing and documenting the project.
I have no idea how (or if) this project is going to turn out. We’re into it for about $600 in materials and about two weeks total of my class’ time. At worst, we had that one lab where we learned about multimeters, voltages, and sensors. My fingers are crossed that this project turns out better than “at worst”.

This sounds awesome! I like the idea of letting them choose their jobs within the company. I have been letting groups break up work on their own, but it’s a nightmare to assess. I might try this next project.
I look forward to hearing how you assess this one. I feel like this is my biggest weakness right now. Awesome projects, engaged students, no idea how to assign a score.
You had to know that assessment was the hardest part of this whole thing didn’t you? Here’s where I am right now: I’m relying on the students to provide evidence of them meeting each of the rubric targets. No matter what job they took on, I’ll expect to see some proof for each grading area. They’re going to provide that evidence to me by filling out a Google Form at the end of the project. Like you, I feel like coming up with the project and engaging the students are the easy parts of this work. My next update will include the rubric and Google form I described to you here. Help me make it better?
I like the sound of this. It’s like they’re self assessing, like “here’s the rubric, you fill it in”. Can’t wait to hear how it goes!