 This year, we* inserted a project on buoyancy in between two units on forces (the Modeling Instruction with Computational Modeling curriculum). Results were encouraging and I wanted to share why this project is a keeper.
The project consisted of an extended lab report and a whiteboard model of buoyancy. Teachers intervened only lightly content-wise to help students draw conclusions from their experiments. What you see on the example boards throughout this post is pretty unfiltered.
Background on our Class Environment
As teachers, our experience with teaching model-building is admittedly novice. We’re totally doing too much of the heavy lifting — but we’re learning!
For instance, earlier in the year, we studied two entire units and near the end, we handed out teacher-made models to summarize what we learned. Recognizing we took too much of the control, we next asked students made their own models. But without much training, these were really just sheets of notes.
A conversation about what it would look like to get students to build a good model led us to the following project.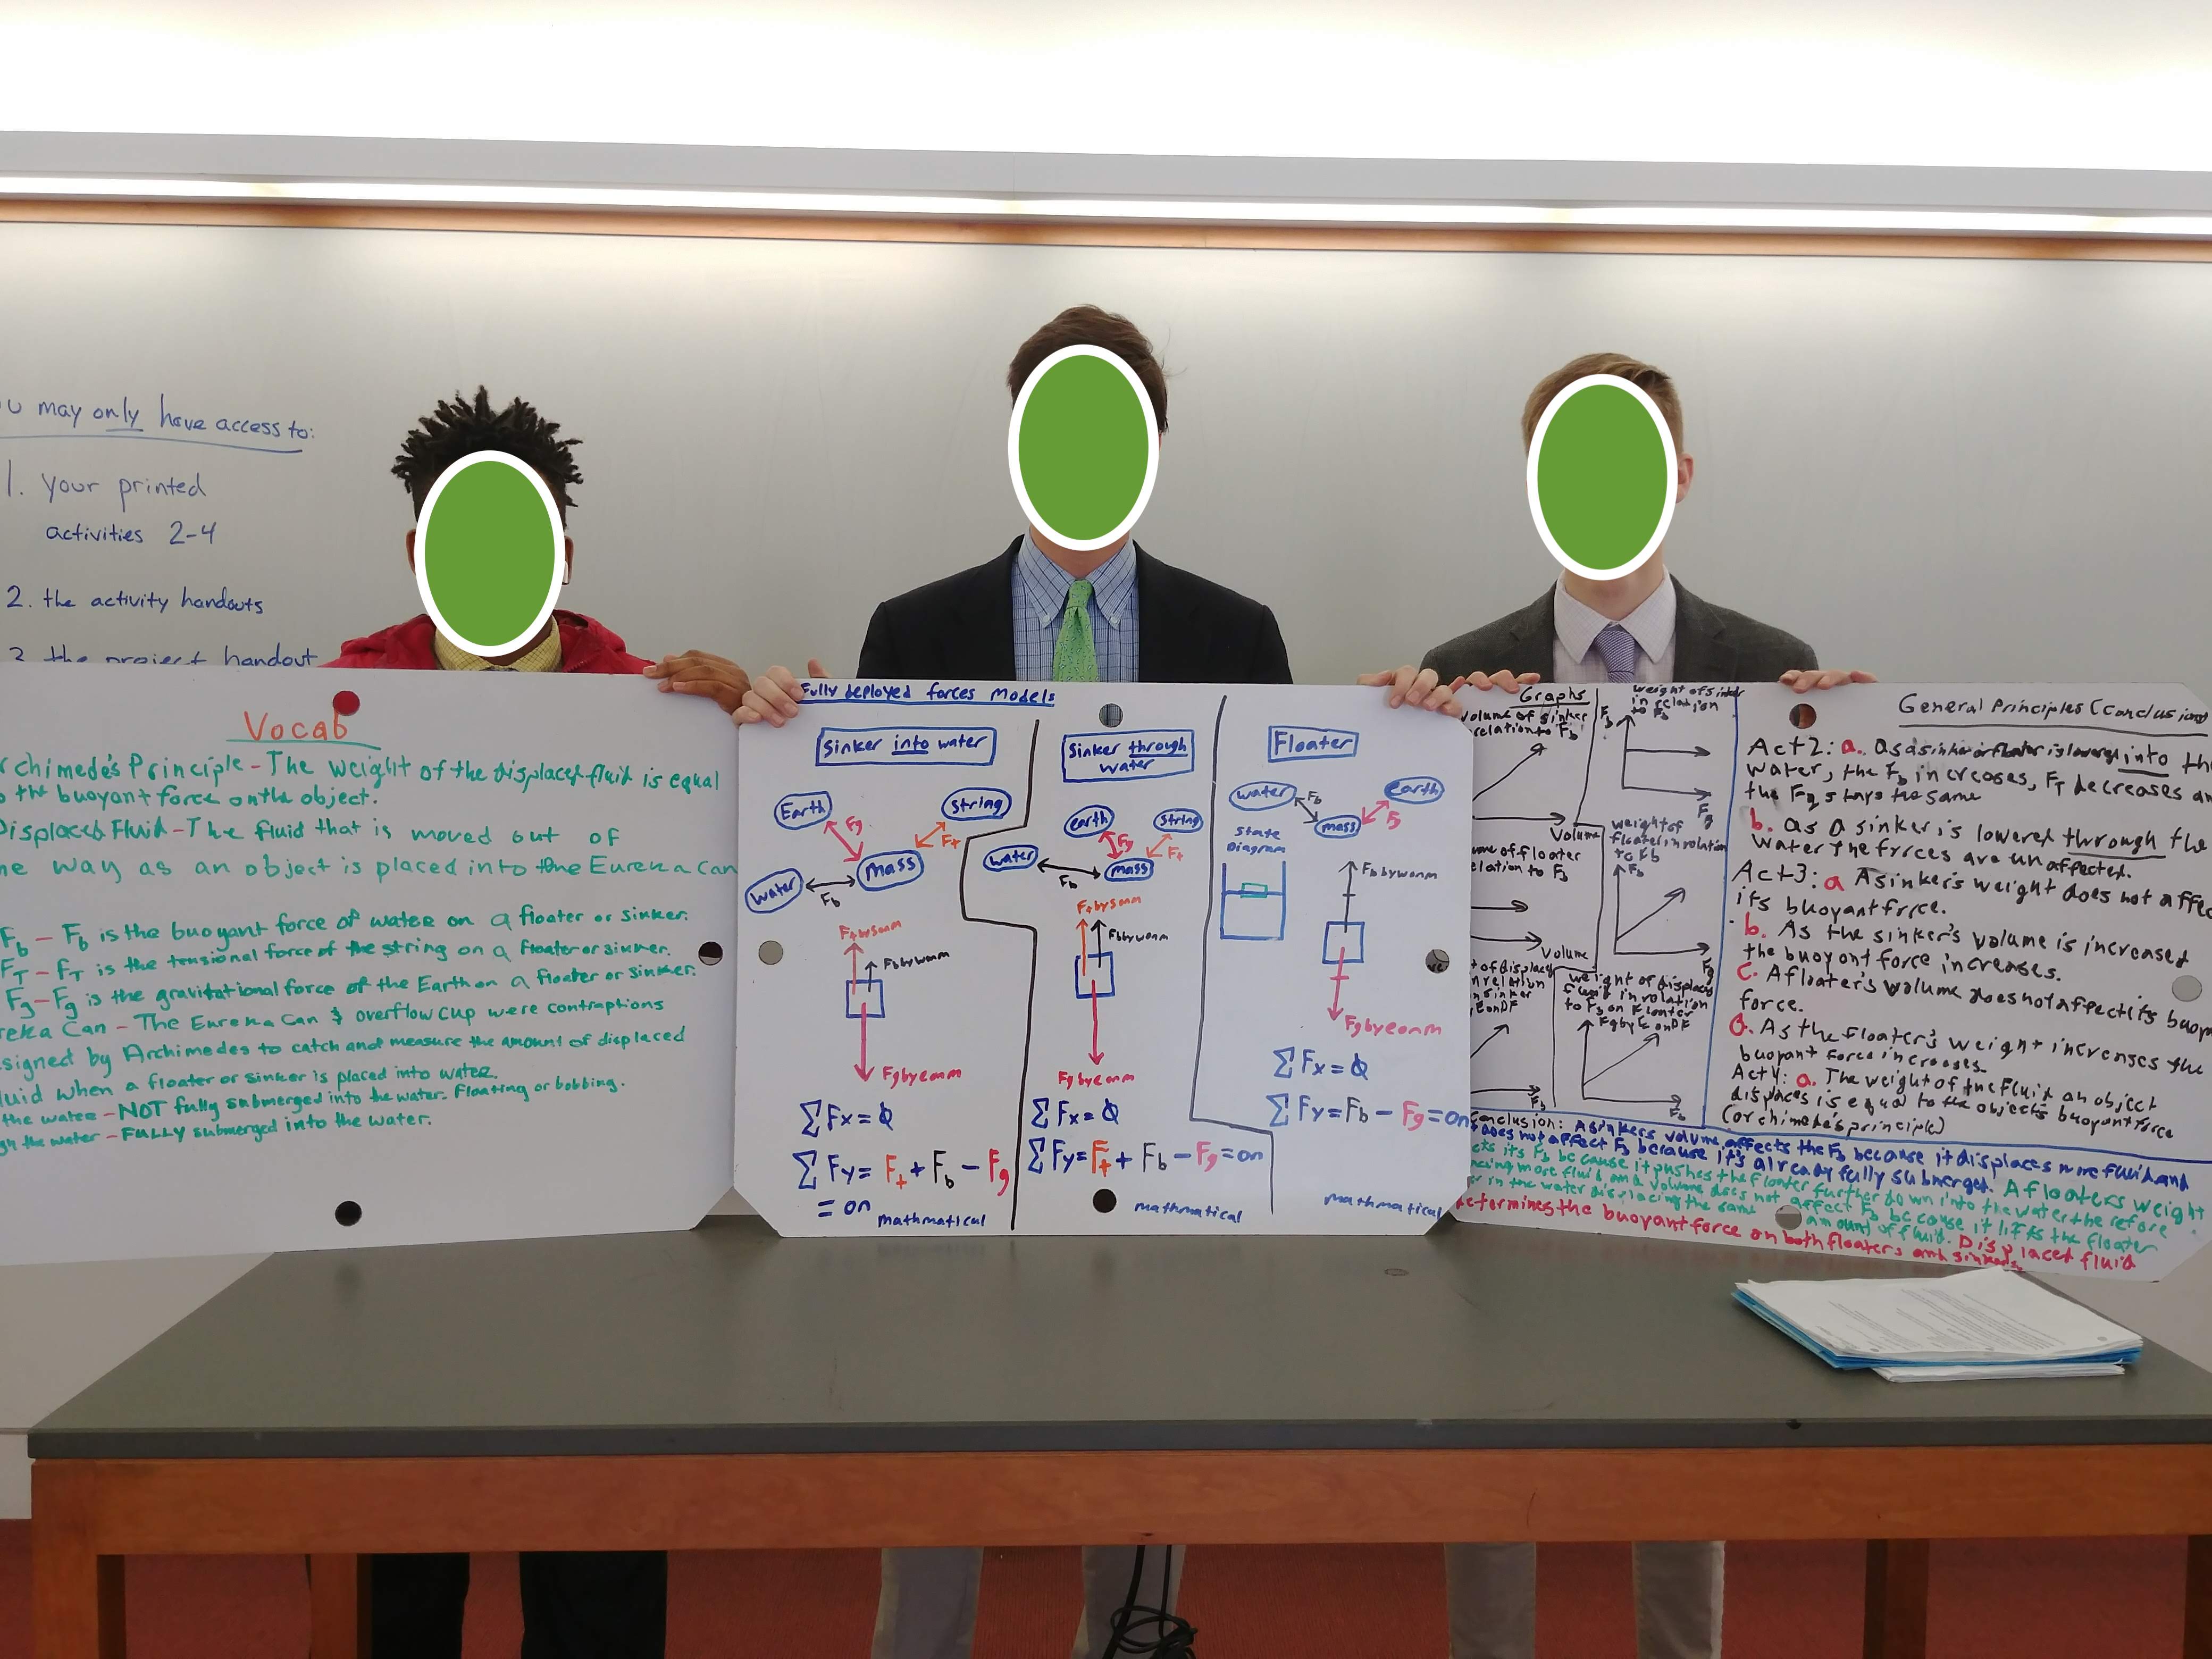
About the Unit
Students spent about two weeks working through a series of labs learning about buoyancy. This was the first time, however, that we pretty much cut the kids loose to create the model without much guidance from us.
This unit teaches buoyancy through the investigation of floaters and sinkers. Here are the project files and a brief description of what each does:
- Buoyancy Project — the overall project description and marking information
- Floaters vs Sinkers — put different objects in water and try to describe why some float and others don’t.
- Fg vs Mass (only because we hadn’t done it yet — this is a lesson plan more than an activity). Here, we get to Fg = mg.
- Buoyant Force — this activity gets them to the buoyant force changes as the object slips into the water but doesn’t change with increasing depth underwater.
- Factors Affecting the Buoyant Force — students learn that for floaters, the buoyant force is a factor of weight but not volume and for sinkers, the buoyant force is the opposite.
- Overflow — students explore the weight of displaced water to unify an explanation for how buoyancy works on both sinkers and floaters.
About the Project
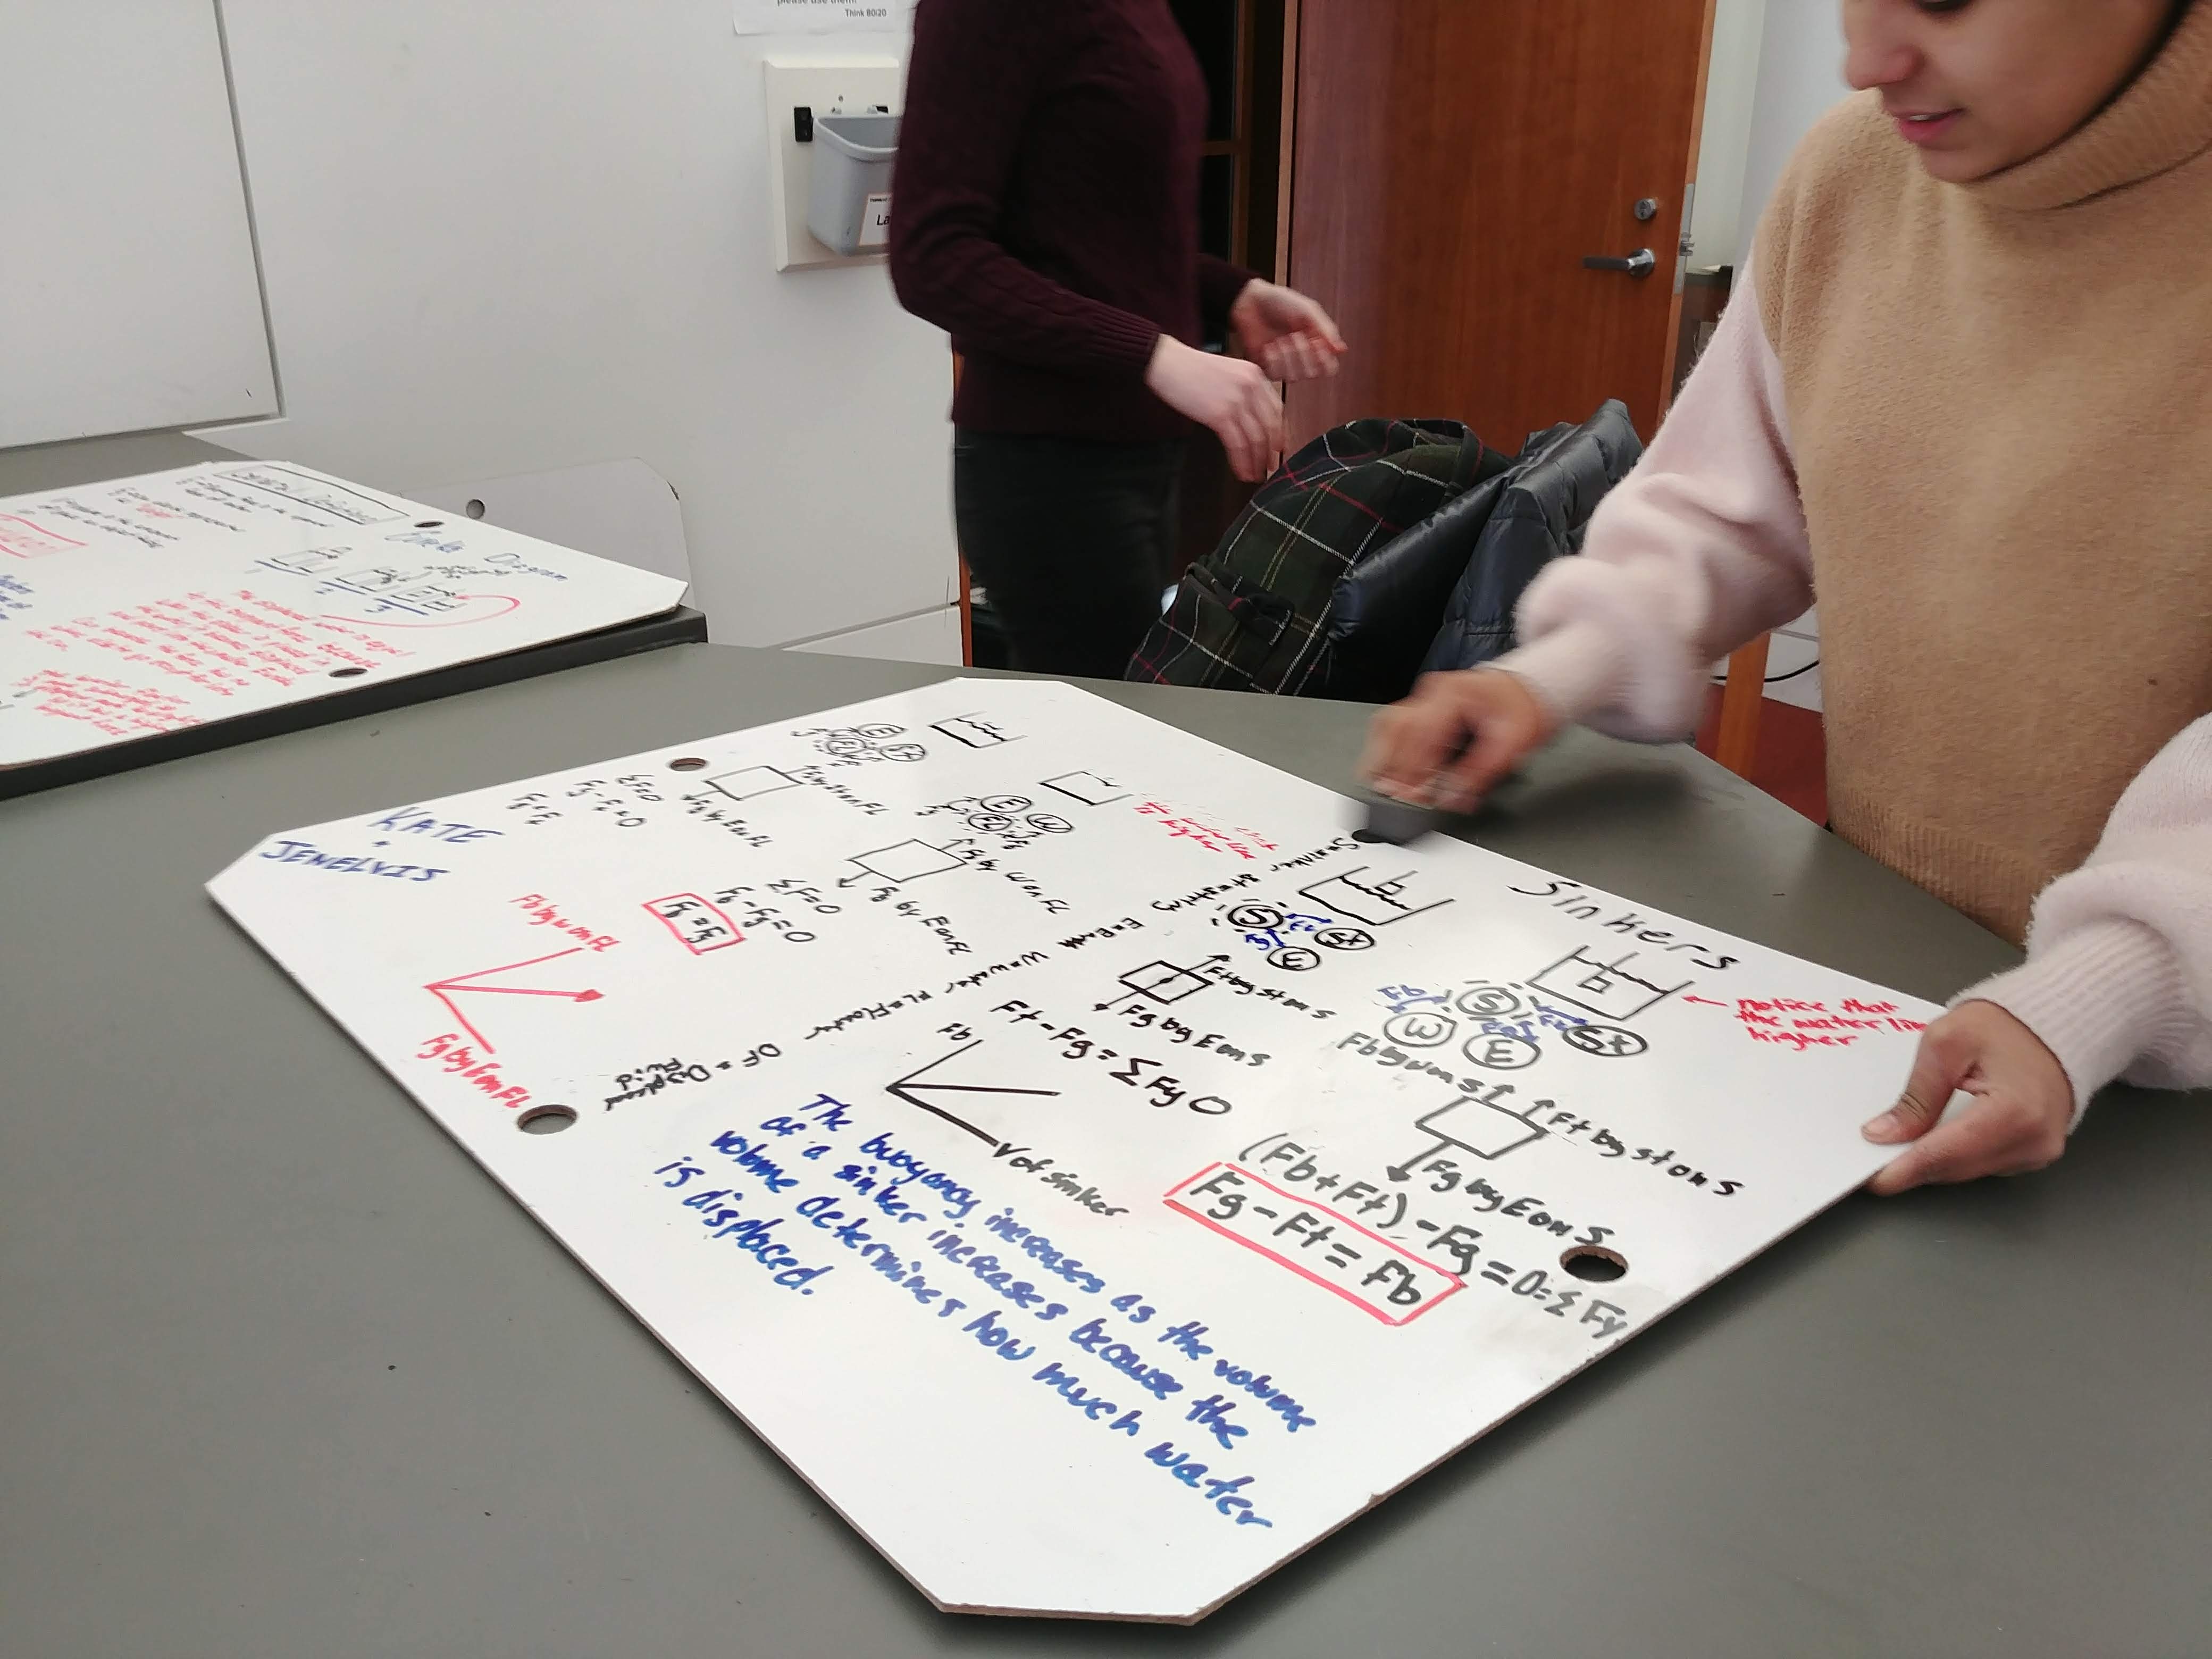
Students submitted a writeup of three of the activities we did in class. The writeups were basically lab reports, something we don’t really do in this course. Select photos below.
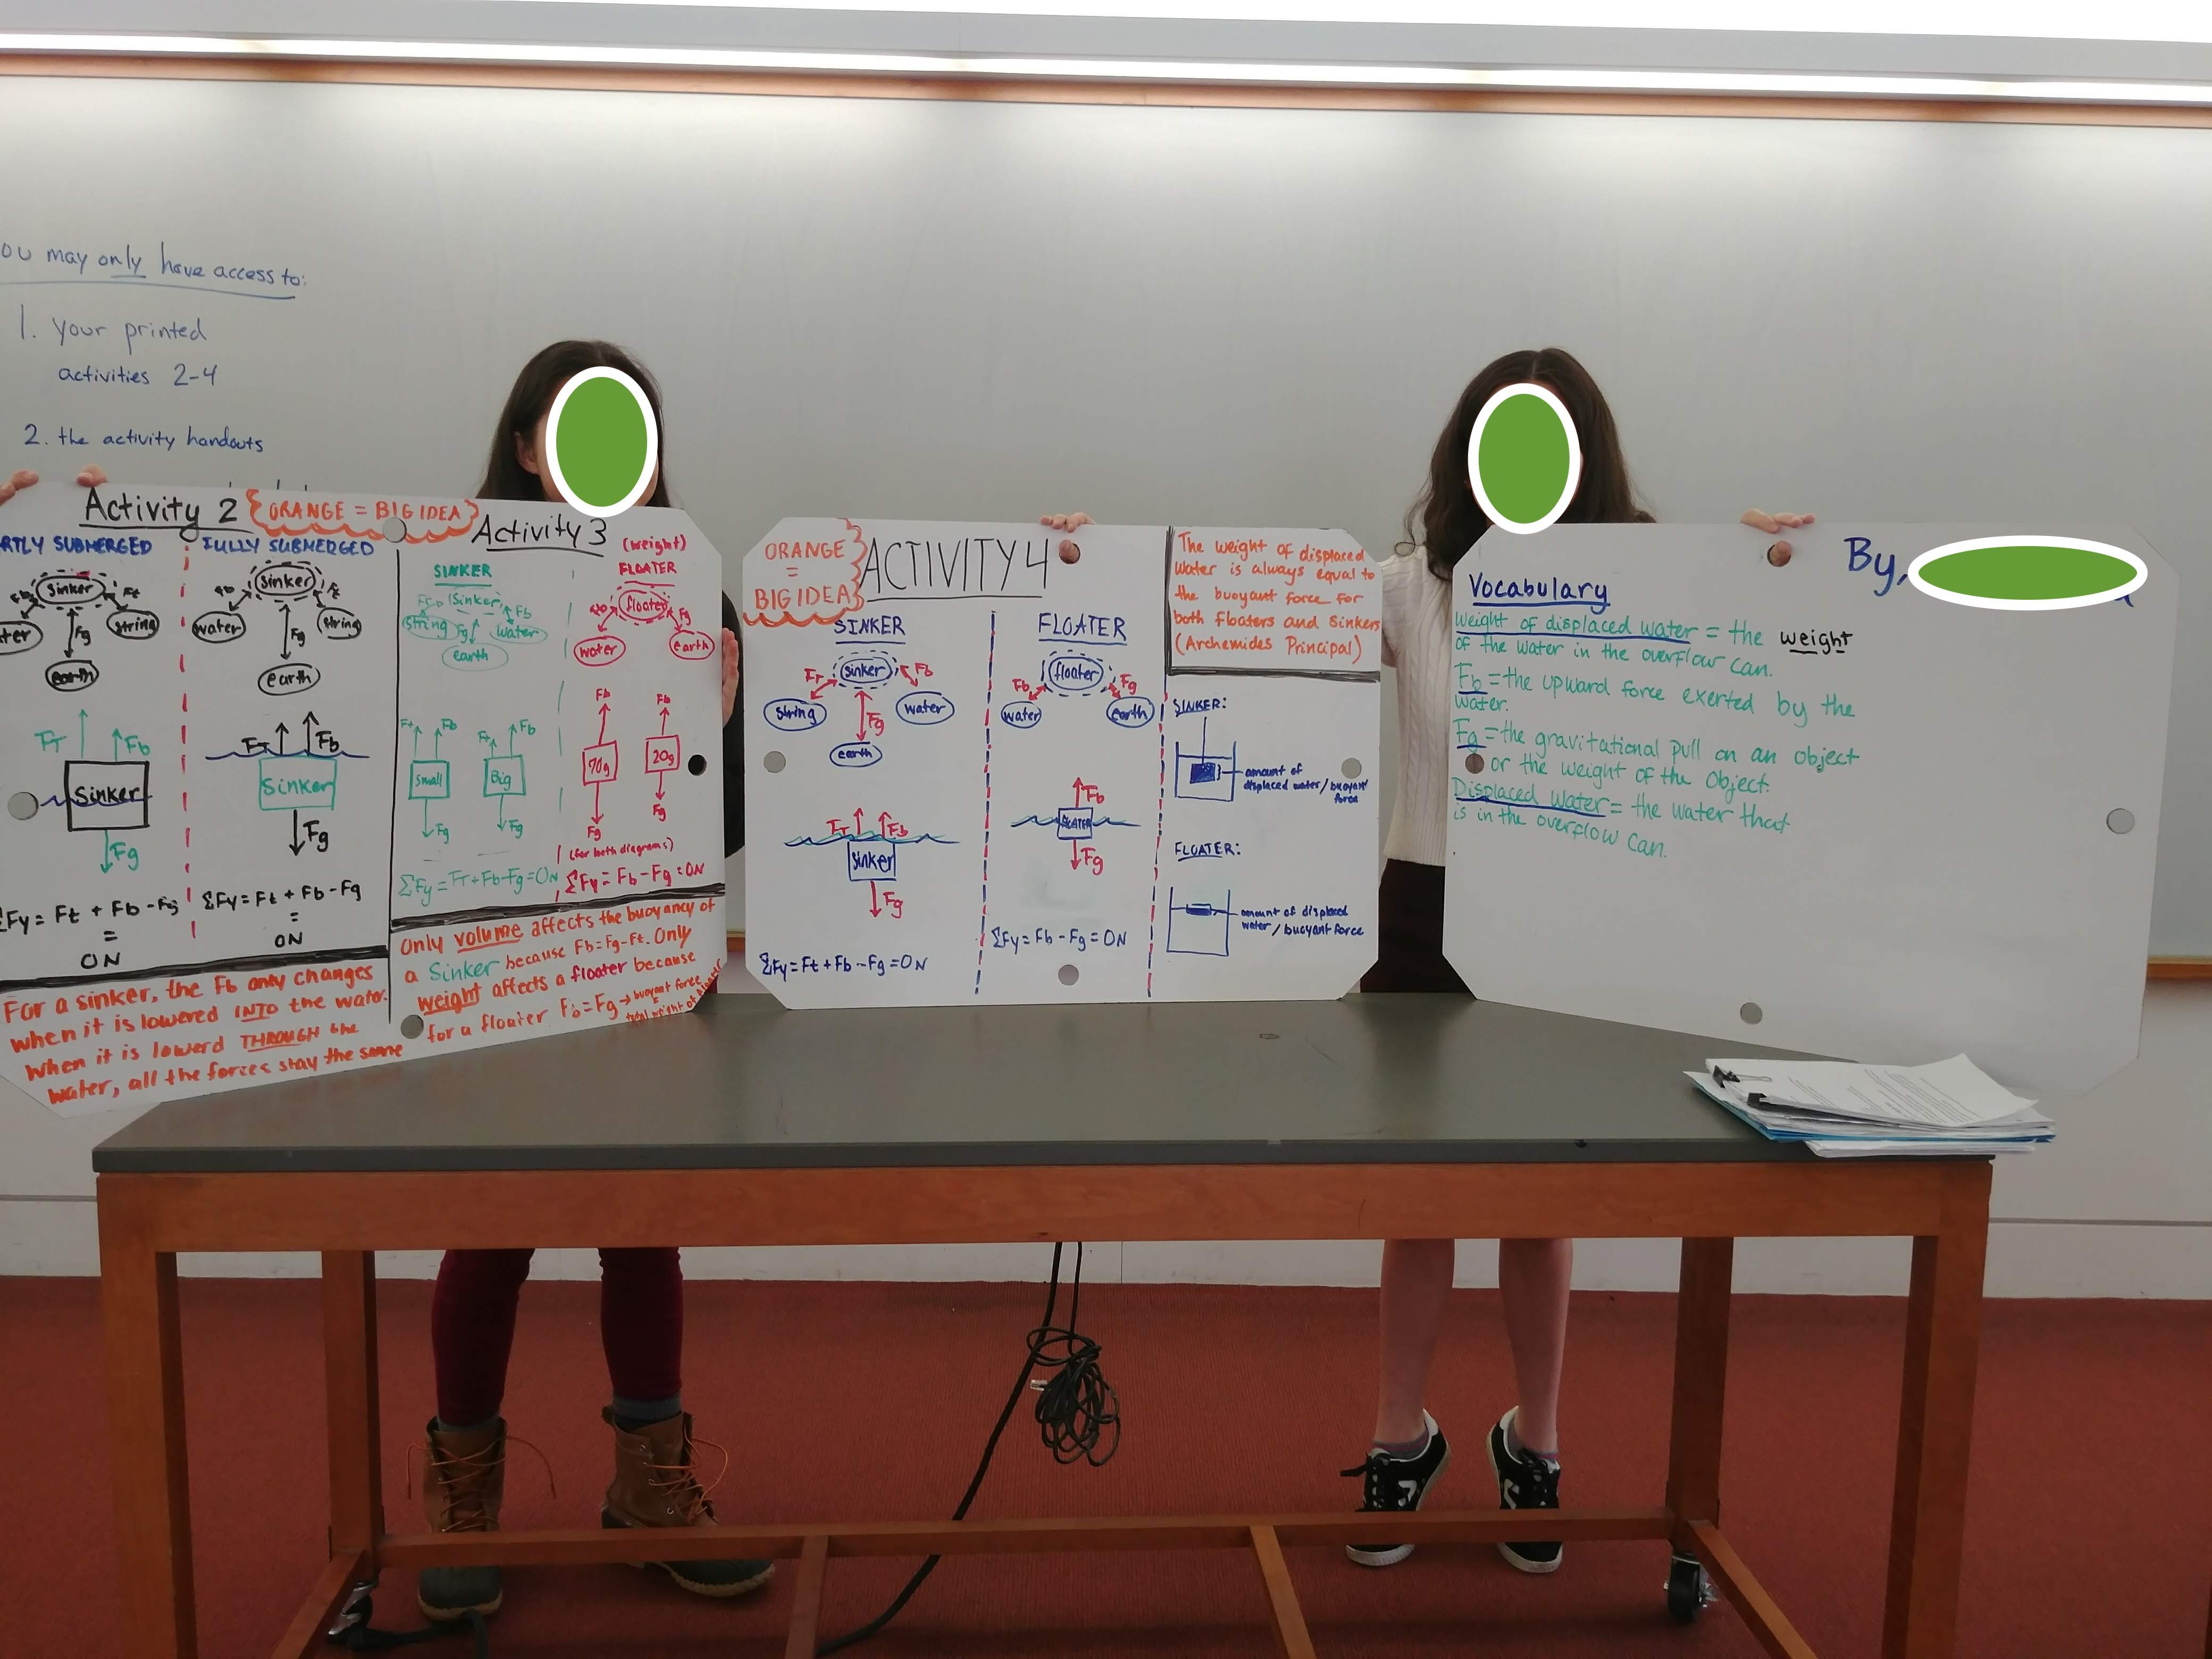
On the last day of the unit in class, we asked students to create whiteboard-based models of buoyancy referencing the writeups. I’ve scattered a representative sample of whiteboards above. Click and zoom in to see how they organized their learning.
Finally, after about an hour of work, we took detailed photos of the whiteboards and the kids erased them. Never have I seen students so reluctant to erase their work.
Why is it a Keeper?
Yeah, so that’s the buoyancy project. The student-made models were way better than in the last unit. We were able to provide scaffolding so they could learn how to select knowledge and ideas for the boards.
There are definitely cons to the project — most notably, some kids got left behind and never quite caught up to the ideas in later activities. In the future, I want to build in more class activity wrap discussion (in the spirit of Modeling Instruction). More “hey, these seem like big ideas I want to write down.”
Also, this project produced a mountain of grading I’ve only just now summited.
Overall, though, I was impressed with the students on the project. They’re better at organizing a lot of ideas into a limited space, at grouping similar ideas, and at contrasting ideas. We’ll definitely do the buoyancy project again.
—
* we = my teaching team of three Physics I teachers. Together, we teach five sections of ninth grade physics.
